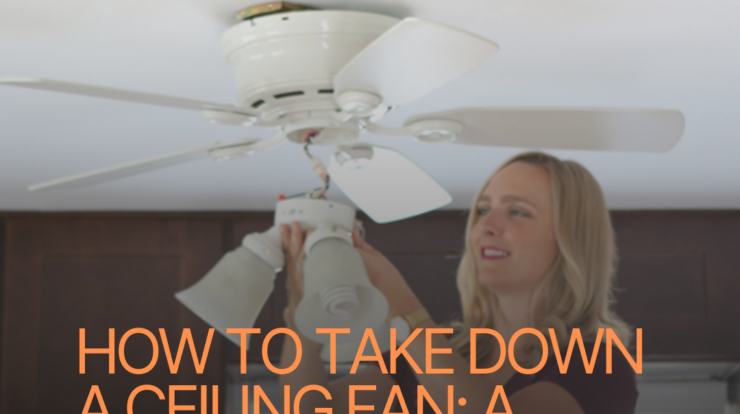
How to Take Down a Ceiling Fan
Introduction
Ceiling fans are common fixtures in many homes, providing comfort and energy efficiency. However, there comes a time when you need to take down a ceiling fan, whether it’s for replacement or maintenance. This step-by-step guide will walk you through the process of safely and efficiently How to Take Down a Ceiling Fan while highlighting essential safety precautions.
I. Understanding the Importance of Ceiling Fan Removal
Before we dive into the removal process, let’s understand why you might need to take down a ceiling fan:
- Upgrading: You might want to replace your old ceiling fan with a new, more stylish one.
- Maintenance: Routine cleaning and maintenance are crucial for a fan’s performance.
- Repair: Fixing a faulty motor or other components may require removal.
- Redecorating: If you’re redecorating your room, a fan removal can be necessary.
II. Safety Precautions and Tools Required
Safety should be your top priority when dealing with electrical appliances. Here are the key safety precautions and tools you’ll need:
Safety Precautions:
- Turn off the Power: Always turn off the circuit breaker or switch that controls the fan.
- Use Safety Gear: Wear safety glasses, gloves, and appropriate clothing.
- Work on a Stable Surface: Use a sturdy ladder or platform to reach the fan.
- Have a Helper: Enlist someone to assist you, especially with heavier fans.
Tools Required:
- Screwdriver (Phillips and flathead)
- Voltage tester
- Wire nuts
- Pliers
- Ladder or step stool
- Safety glasses and gloves
III. Assess the Situation
A. Identifying the Ceiling Fan Type
Before you start, determine the type of ceiling fan you have, as the removal process may vary:
| Ceiling Fan Type | Description |
|---|---|
| Standard Ceiling Fan | Hangs from a downrod and has a decorative canopy. |
| Flush Mount Fan | Installed directly against the ceiling, no downrod. |
| Angled Ceiling Fan | Designed for sloped ceilings, has an angled canopy. |
| High Ceilings | May require special considerations for removal. |
B. Examining the Wiring Setup
Understanding the wiring is crucial. Typically, you’ll find:
- Black (Hot) Wire: Carries electricity from the switch.
- White (Neutral) Wire: Completes the electrical circuit.
- Green or Bare Copper Wire: The ground wire for safety.
C. Turning off the Power
Locate the circuit breaker or wall switch that controls the fan and turn it off. Use a voltage tester to ensure there’s no electricity flowing to the fan.
IV. Gather Necessary Tools and Materials
Now that you’re prepared, gather the necessary tools and materials:
A. Tools for Removal
- Screwdriver
- Pliers
- Voltage tester
- Wire nuts
B. Safety Gear and Equipment
- Safety glasses
- Gloves
- Ladder or step stool
V. Step-by-Step Removal Process
A. Removing the Ceiling Fan Blades
1. Unfastening Blade Screws
- Locate the screws attaching the blades to the motor.
- Use the appropriate screwdriver to unfasten them.
2. Detaching the Blades
- Carefully remove the blades from the motor.
B. Disconnecting Electrical Connections
1. Turning off the Switch
- Double-check that the power is off.
- Turn off the wall switch controlling the fan.
2. Using a Voltage Tester
- Use a voltage tester to confirm that there is no electrical current.
3. Removing Wire Nuts
- Unscrew the wire nuts that connect the fan wires to the electrical box.
C. Detaching the Mounting Bracket
1. Unscrewing the Bracket from the Ceiling
- Locate the screws holding the mounting bracket to the ceiling.
- Use a screwdriver to unscrew them.
2. Careful Handling of the Bracket
- Carefully lower the mounting bracket without damaging the wires.
D. Safely Lowering the Fan
- With the fan disconnected, gently lower it to the ground with the help of a helper.
VI. Handling Different Ceiling Fan Types
A. Standard Ceiling Fans
Standard ceiling fans are the most common type. They usually have a downrod and a decorative canopy.
B. Flush Mount Ceiling Fans
Flush mount fans are directly attached to the ceiling and don’t use a downrod.
C. Angled Ceiling Fans
Designed for sloped ceilings, these fans have an angled canopy.
D. High Ceilings and Downrod Lengths
If you have high ceilings, be cautious when removing the fan, as it may be heavier due to a longer downrod.
VII. Dealing with Common Issues
Ceiling fan removal may encounter some common issues:
A. Stubborn Blade Screws
If the blade screws are stuck, try using a penetrating oil or tapping the screw lightly to release it.
B. Stuck or Over-tightened Mounting Bracket
If the mounting bracket is stuck or over-tightened, apply gentle pressure while unscrewing.
C. Old or Faulty Wiring
If you encounter old or faulty wiring, consider consulting a professional electrician for assistance.
VIII. Cleaning and Maintenance Tips
After removal, consider these cleaning and maintenance tips:
A. Cleaning the Blades and Motor
- Use a damp cloth to wipe down the blades.
- Vacuum or dust the motor housing.
B. Checking for Loose Screws
Inspect all the screws and tighten any that may have loosened over time.
C. Lubricating Moving Parts
Apply lubricant to any moving parts to ensure smooth operation.
IX. Reinstalling or Replacing the Fan
A. Deciding Whether to Reinstall or Replace
Evaluate the condition of the fan and decide whether to reinstall it or opt for a new one.
B. Reinstalling the Same Fan
If you choose to reinstall, reverse the removal steps carefully.
C. Choosing a New Ceiling Fan
If you opt for a new fan, research and select the one that suits your needs and style.
X. Patching and Repainting the Ceiling
A. Filling Holes and Gaps
Patch any holes or gaps left in the ceiling after removal.
B. Matching Paint Colors
Paint the patched areas to match the ceiling’s color.
XI. Final Safety Checks
Before completing the process, perform these final safety checks:
A. Reconnecting Electrical Wires
Follow the wiring diagram to reconnect the fan wires safely.
B. Testing the Fan
Turn on the power and test the fan to ensure it works correctly.
C. Double-Checking for Stability
Make sure the fan is securely attached to the ceiling.
XII. Summary
In summary, removing a ceiling fan is a manageable DIY task if you follow the right steps and take necessary safety precautions. Whether you’re upgrading, maintaining, or redecorating, this guide provides the knowledge and steps you need to accomplish the task safely and efficiently.
XIII. FAQs
A. Can I remove a ceiling fan without any electrical knowledge?
While basic DIY skills are helpful, it’s safer to have some electrical knowledge or consult a professional.
B. What if the ceiling fan is too heavy to handle alone?
Enlist the help of a friend or family member to assist you with the removal process.
C. How do I dispose of my old ceiling fan?
Check your local regulations for proper disposal methods. Many areas allow recycling or disposal at designated facilities.
D. Is it necessary to turn off the circuit breaker before starting?
Absolutely. Always turn off the power to prevent electrical accidents.
E. Can I install a new ceiling fan in the same spot?
Yes, you can reinstall a new fan in the same location if it meets safety and compatibility requirements.
F. How often should I clean my ceiling fan?
Regular cleaning is recommended, at least once every few months, to maintain optimal performance.
XIII. Conclusion
Removing a ceiling fan is a task that, with proper preparation and caution, you can confidently tackle. By following the steps outlined in this guide, you can safely and efficiently take down your ceiling fan, whether it’s for replacement, maintenance, or redecoration. Empower yourself with knowledge, and enjoy a more comfortable and stylish living space.